Enrolling Multiple Devices Into WireGuard
Pro Custodibus can be used to enroll many devices at once into a WireGuard network, providing all of them access to the same network through a central hub. This article will show you how. We’ll follow these steps:
Set Up the Hub Host
First, set up the host that will serve as the hub of the WireGuard network. This host can be the hub in a hub-and-spoke network, the site gateway in a point-to-site network, or the Internet gateway in a point-to-Internet network. (Skip to the Configure the Endpoint Defaults step if you’ve already set up the hub host.)
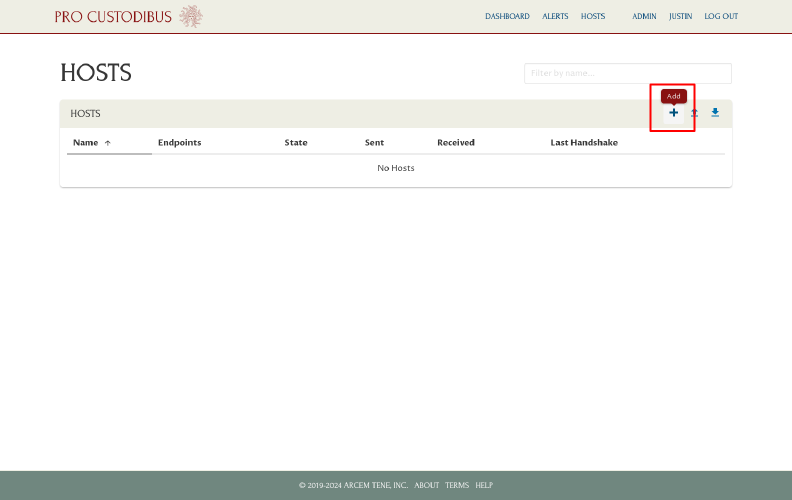
For this example, we’ll create a new host record in Pro Custodibus for a server at cloud site with a publicly-accessible IP address, and use it as the hub for a hub-and-spoke network. To do this, log into Pro Custodibus, navigate to the Hosts page, and click the Add icon:
Name the host (“Main Hub”), and select the Create new WireGuard configuration to push to host option. Then click the Add button:
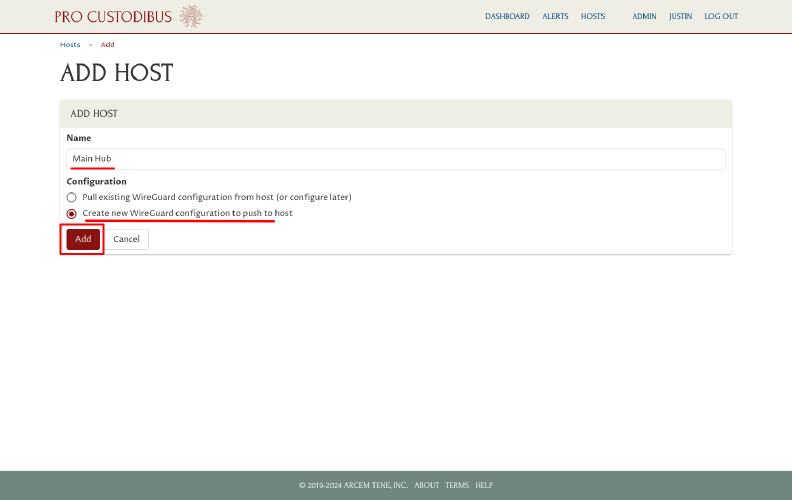
This will create a record for the host in Pro Custodibus, and start the Add Interface Wizard.
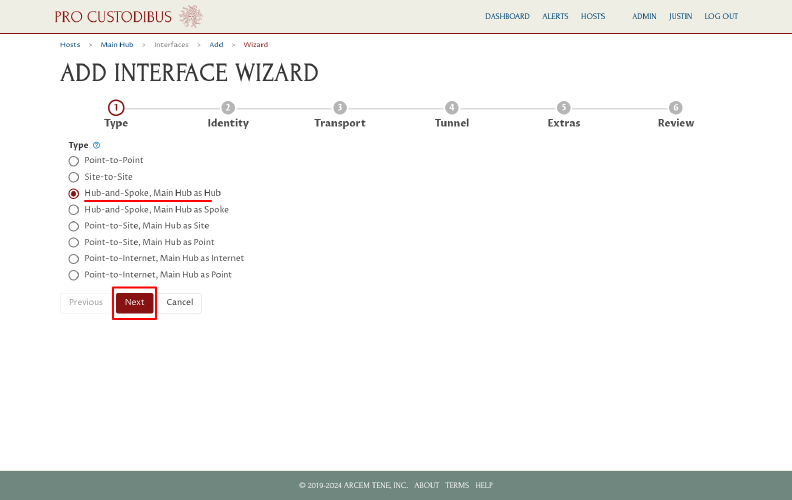
On the first page of the wizard, select the appropriate type of network; in our case, Hub-and-Spoke. Then click the Next button:
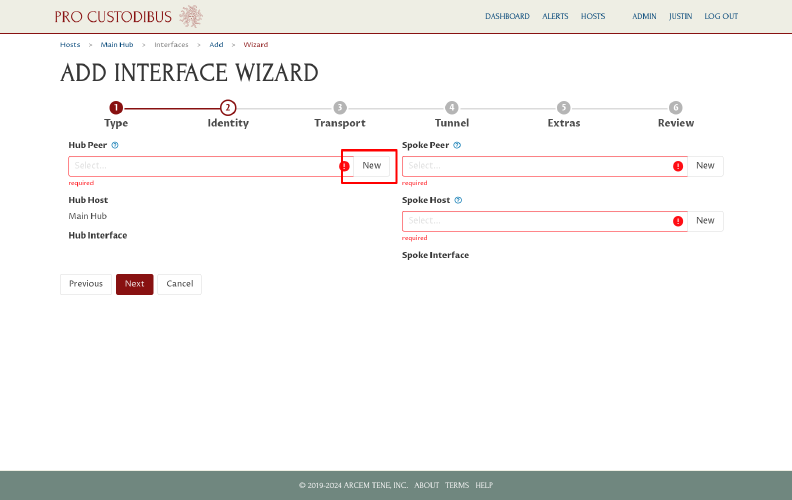
On the Identity page of the wizard, click the New button in the Hub Peer field to create a new peer identity for the hub:
This will open the Add Peer dialog.
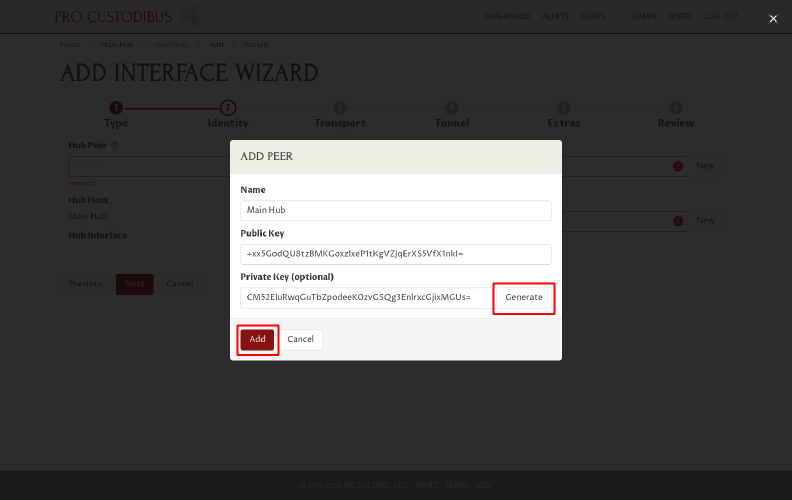
Click the Generate button in this dialog to generate a new key pair, and then click the Add button to create the new peer identity:
To ensure that we set up the hub host correctly, we’ll create a connection to it from a test workstation.
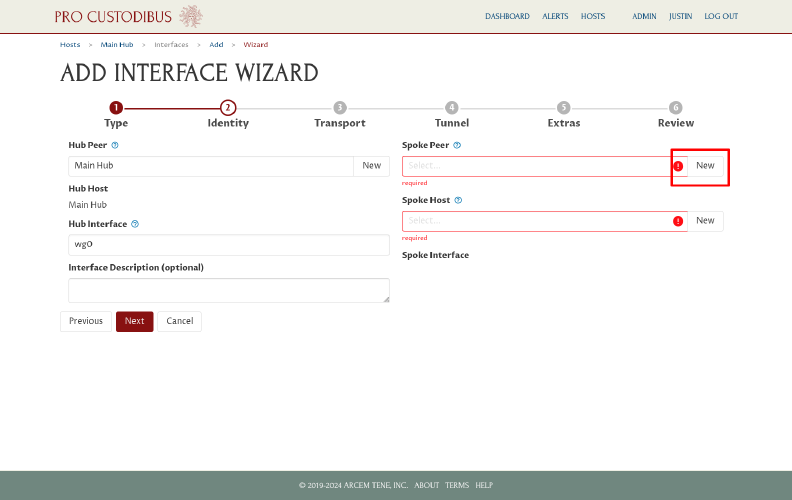
Click the New button in the Spoke Peer field to create a new peer identity for the workstation:
This will open another Add Peer dialog.
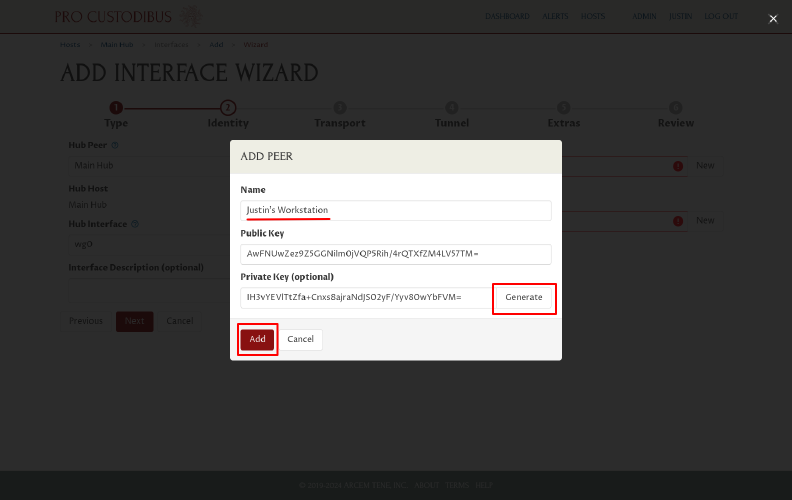
Enter a name for the workstation, then click the Generate button in this dialog to generate a key pair for it, and then click the Add button to create the new peer identity:
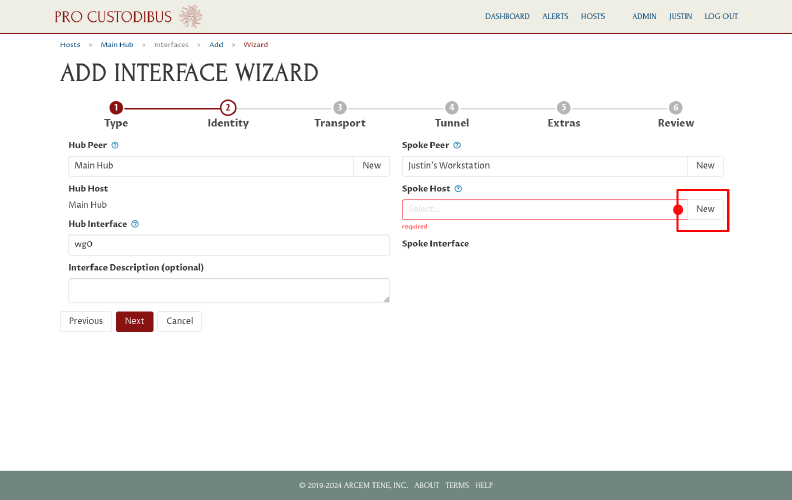
Click the New button in the Spoke Host field to add a new host record for the workstation:
This will open the Add Host dialog.
Click the Add button to use the suggested name for the host (same name as the spoke peer):
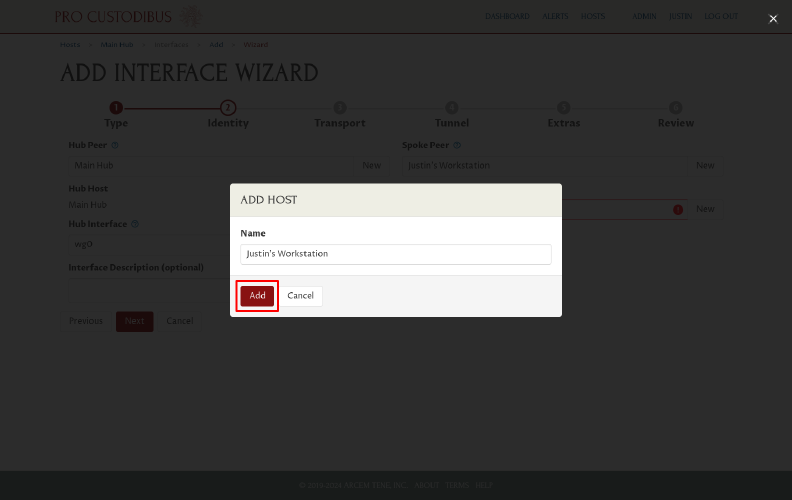
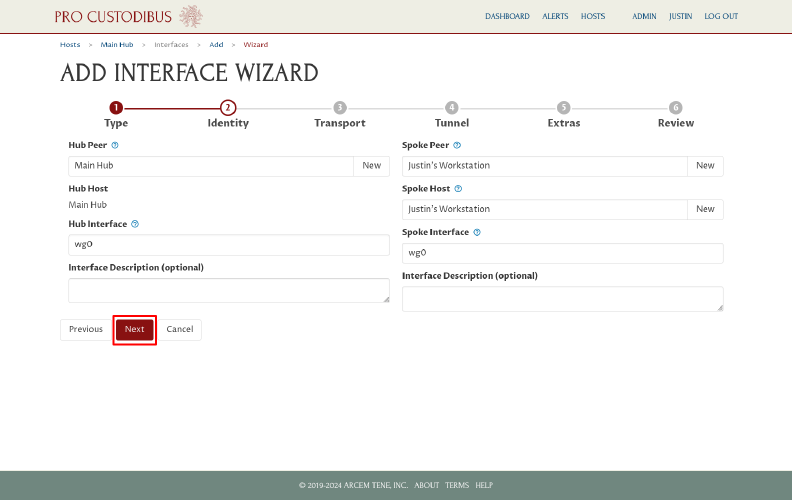
Now click the Next button to proceed to the next page of the wizard:
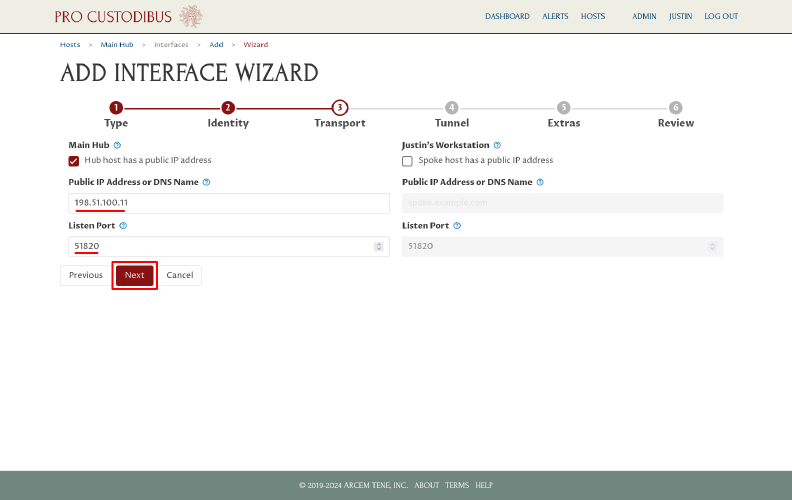
On the Transport page of the wizard, enter the public IP address of the hub host into the Public IP Address or DNS Name field, and enter its public WireGuard UDP port into the Listen Port field (51820 is the default WireGuard port). Then click the Next button:
On the Tunnel page of the wizard, click the Generate button in the WireGuard Network Addresses field to generate a new private address block for the WireGuard network:
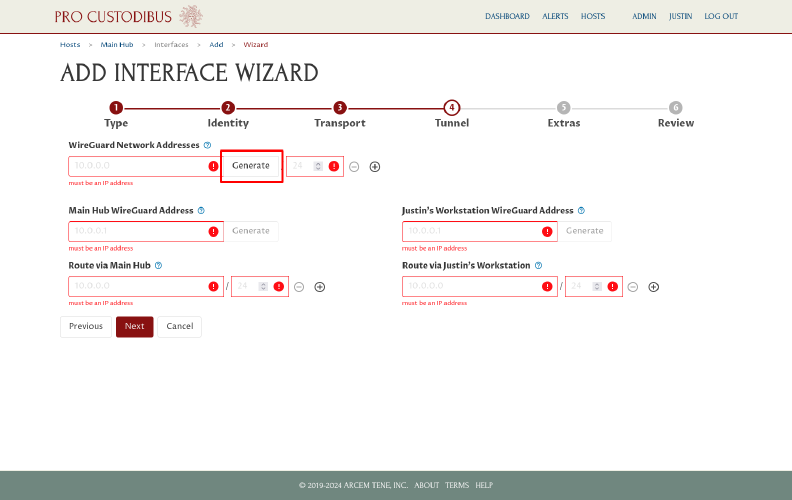
This will open the Generate Network Address dialog box.
First we’ll generate an IPv4 address block for the new WireGuard network. Select an IPv4 address block option (like IPv4 Private Use, 24-bit block), and make sure the With Prefix Field value is set to an appropriate size (a /24 block typically works well, allowing for around 250 WireGuard clients). Then click the Generate button:
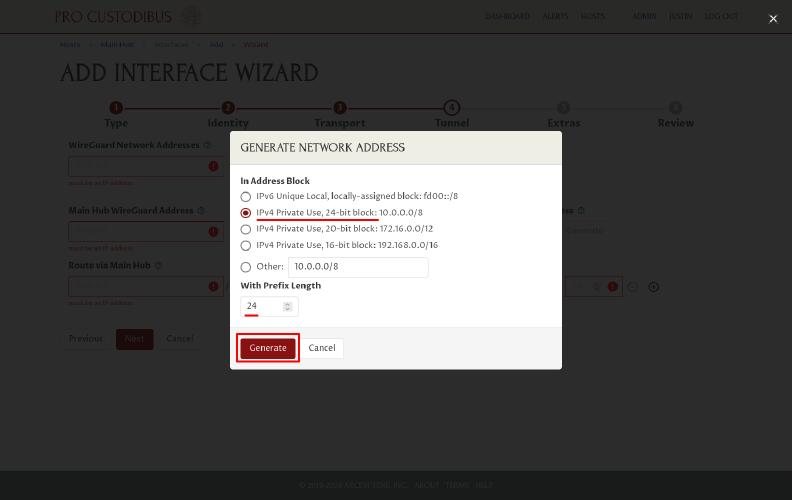
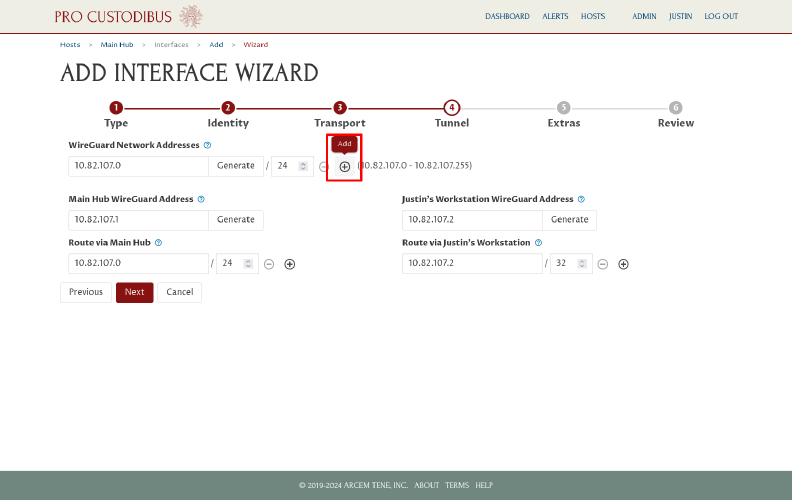
In this case, the dialog box randomly generated a network address block of 10.82.107.0/24.
Click the Add icon next to this block to add a second (IPv6) block:
And click the Generate button next to the new blank network address block:
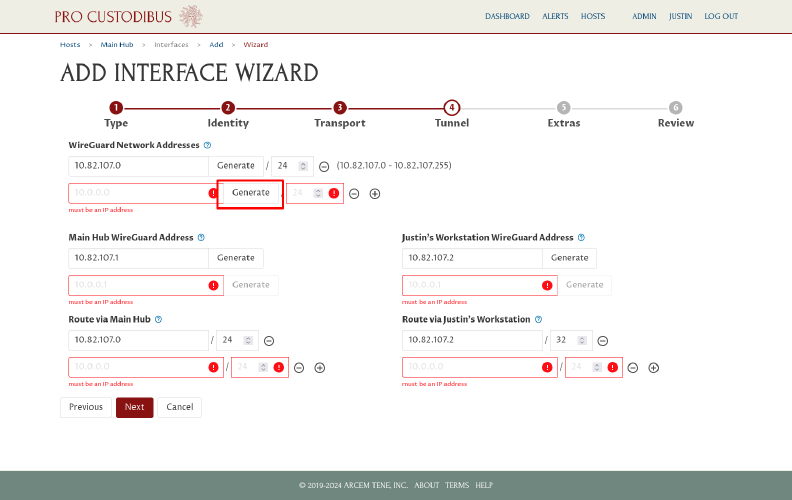
This will open up another Generate Network Address dialog box.
Now we’ll generate an IPv6 address block for the WireGuard network. Select the IPv6 Unique Local, locally-assigned block option, and make sure the With Prefix Field value is set to /64. Then click the Generate button:
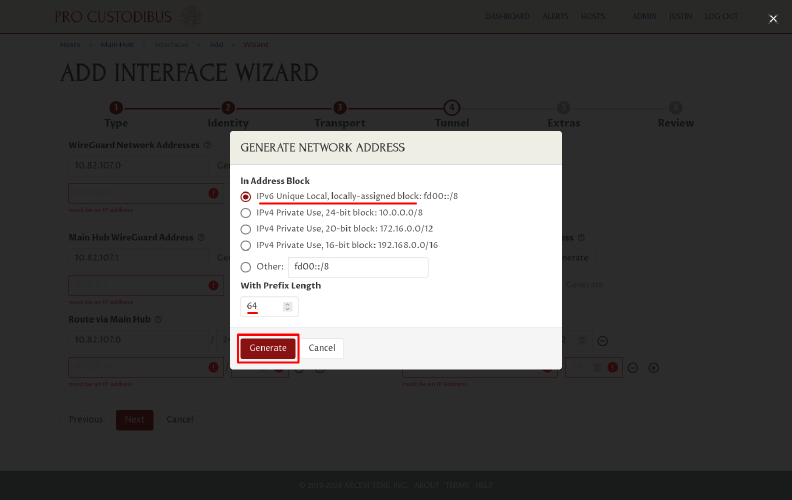
In this case, the dialog box randomly generated a network address block of fd3c:a15:96dc:7911::/64.
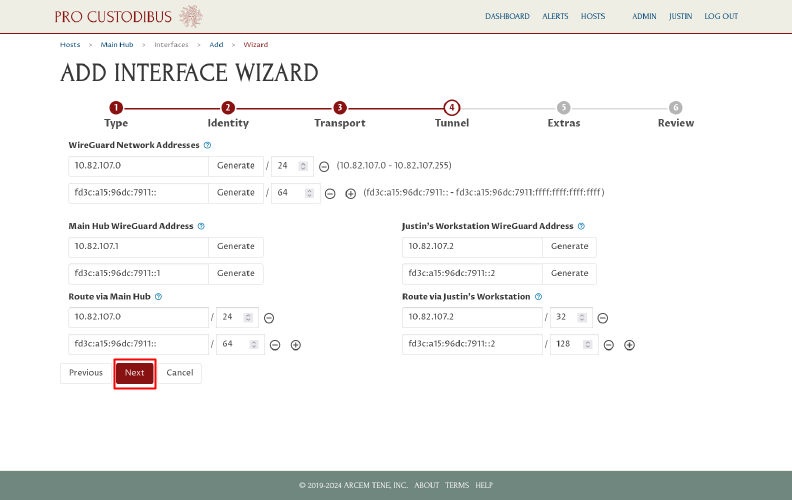
With those network address blocks set, the wizard will automatically assign IP addresses from those blocks to both the hub and the workstation, and will set up the appropriate routing between them.
You can customize the addresses or routing if you like; otherwise, click the Next button to continue:
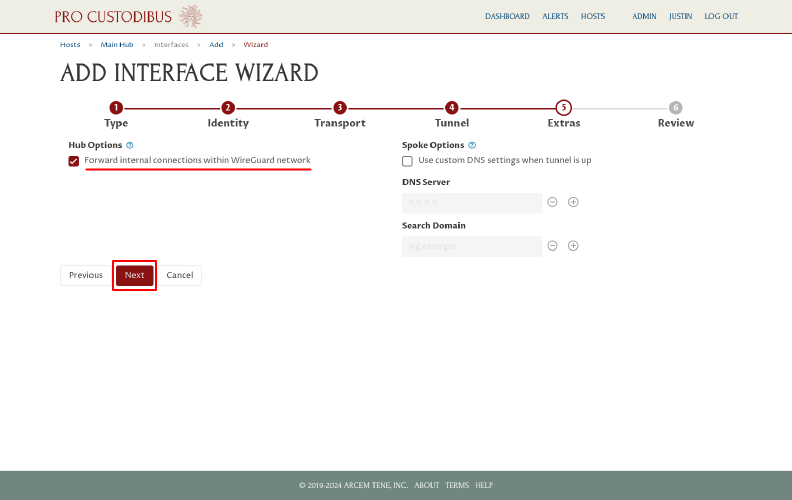
On the Extras page of the wizard, the wizard will automatically select an extra option to configure the firewall on the hub to allow it to forward connections internally within the WireGuard network. Deselect this option if you intend to configure the firewall on the hub manually; otherwise, click the Next button:
On the Review page of the wizard, click the Apply button:
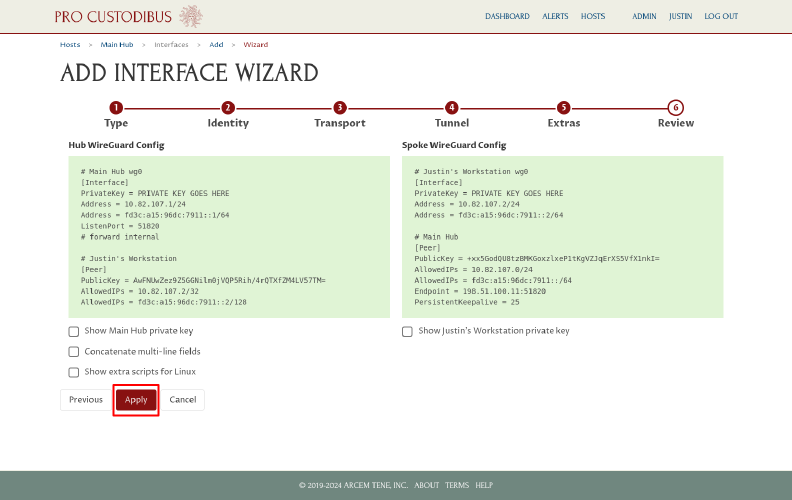
This will save the configuration settings for the hub (and the test workstation host), and queue them to be applied by the Pro Custodibus agent.
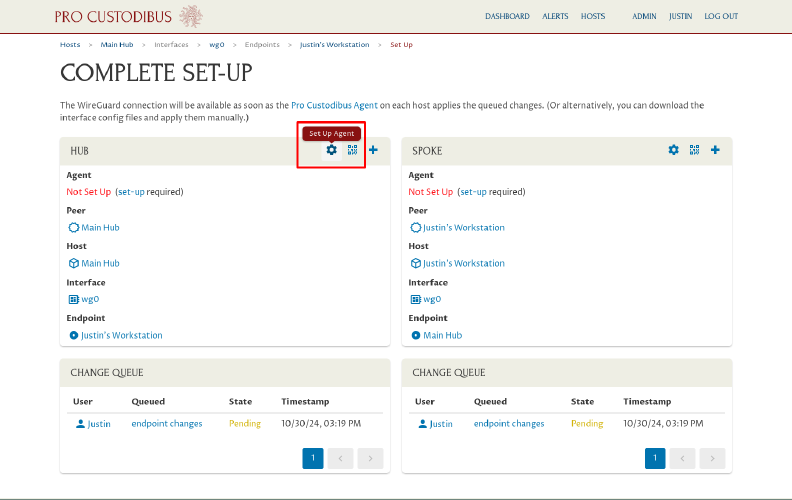
To set up the Pro Custodibus agent on the hub host, on the Complete Set-Up page, click the Set Up Agent icon in the Hub panel:
On the Set Up Host page, click the procustodibus.conf, procustodibus-setup.conf, and Pro Custodibus Agent links:
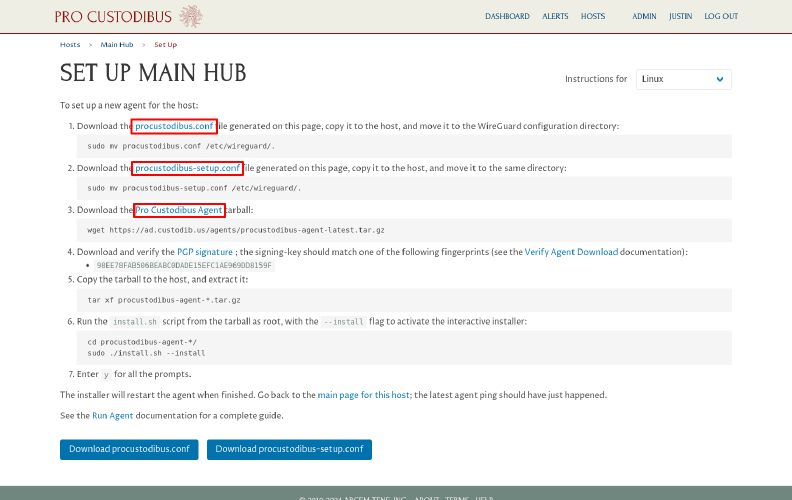
Copy the downloaded procustodibus.conf and procustodibus-setup.conf files into the /etc/wireguard/ directory of the hub server.
Copy the downloaded procustodibus-agent-latest.tar.gz tarball to the hub server, extract it, and run the extracted install.sh script as root.
This will start the Pro Custodibus agent running on the hub server. The agent will download the queued changes from the Pro Custodibus server, and apply them to the hub — activating the server as the hub for the new WireGuard network.
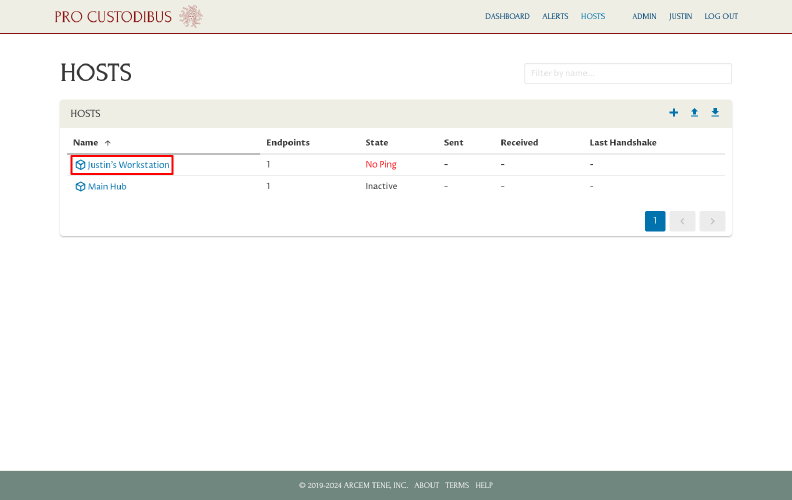
Next, navigate to the Hosts page, and then to the test workstation:
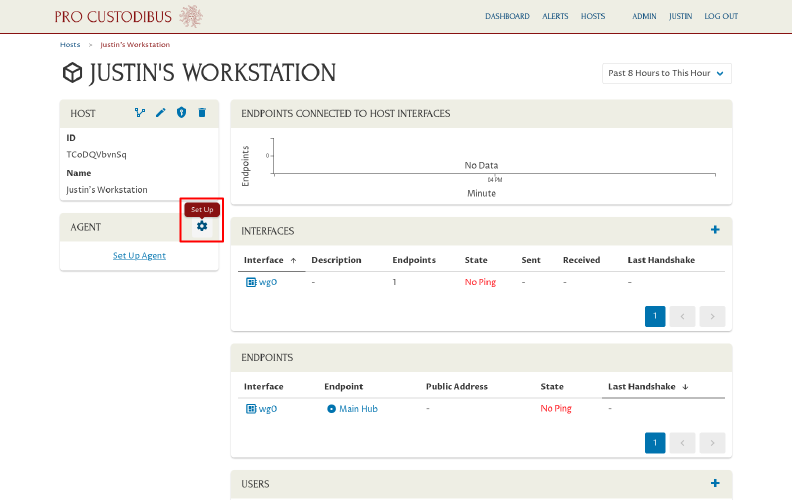
Click the Set Up icon in the Agent panel to access the setup files for the test workstation:
On the Set Up Host page for the test workstation, click the procustodibus.conf and procustodibus-setup.conf links to download the configuration files for the workstation:
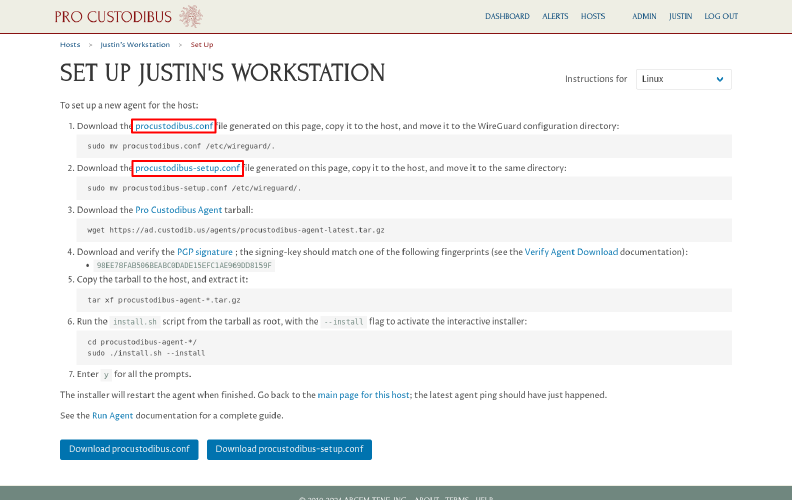
Copy those downloaded procustodibus.conf and procustodibus-setup.conf files into the /etc/wireguard/ directory of the test workstation.
Extract the procustodibus-agent-latest.tar.gz tarball that we downloaded previously, and run the extracted install.sh script as root on the test workstation.
|
Note
|
The |
This will start the Pro Custodibus agent running on the test workstation. The agent will download the queued changes from the Pro Custodibus server, and apply them to the workstation.
We should now be able to access the hub from the workstation using the hub’s WireGuard IP address — for example, to ping the hub:
$ ping -nc1 10.82.107.1
PING 10.82.107.1 (10.82.107.1): 56 data bytes
64 bytes from 10.82.107.1: seq=0 ttl=64 time=24.4 ms

--- 10.82.107.1 ping statistics ---
1 packets transmitted, 1 packets received, 0% packet loss
rtt min/avg/max/mdev = 24.430/24.430/24.430/0.000 ms
Configure the Endpoint Defaults
Once the hub is set up and working, verify that its endpoint defaults are configured with the settings you would like to apply to all the other hosts that we connect to it.
From the Hosts page, click on the name of the hub to navigate to its main host page:
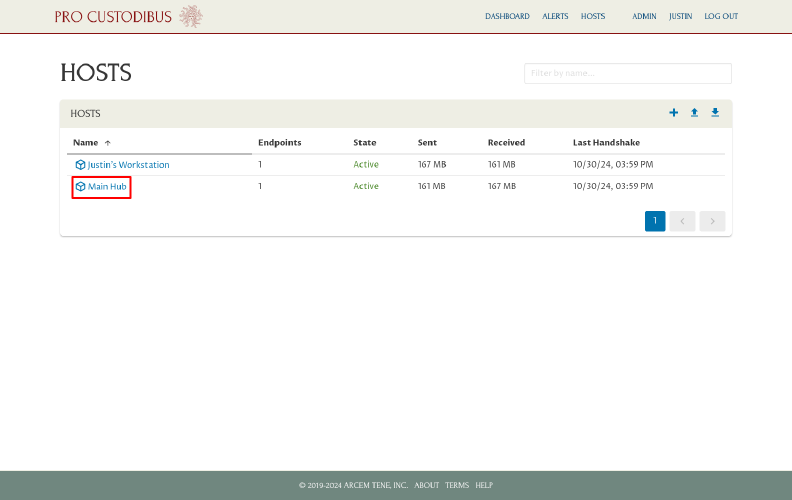
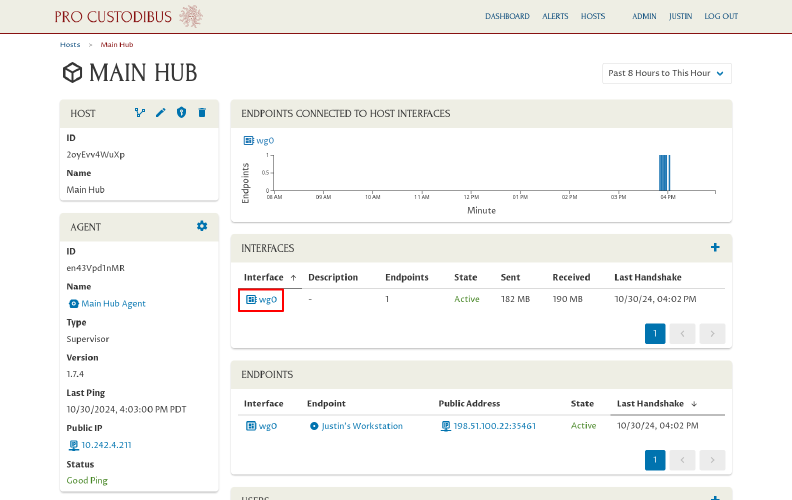
Click the name of its main interface (usually “wg0”) to view the main page for the interface:
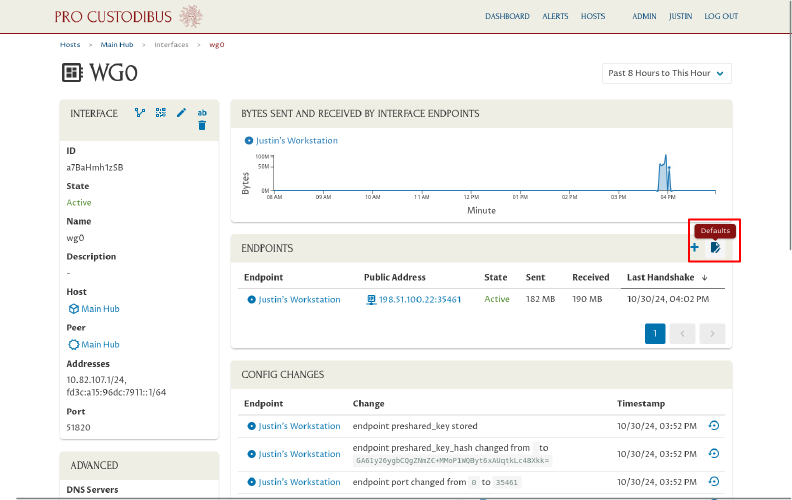
Then on the Endpoints panel, click the Defaults icon to view the default settings for new endpoints of this interface:
Review the settings on Defaults page. In particular, make sure the following settings are configured (and are still appropriate for the hub):
- Type
-
Select one of the following types:
-
Hub-and-Spoke, Remote as Spoke
-
Point-to-Site, Remote as Point
-
Point-to-Internet, Remote as Point
-
- Allowed IPs
-
Specify the IP addresses that the new hosts should route through the hub.
- Hostname
-
Specify the publicly-accessible DNS name or IP address of the hub.
- Port
-
Specify the publicly-accessible UDP WireGuard listen port of the hub.
- Network Addresses
-
Specify the network address blocks from which new WireGuard addresses will be chosen.
If you need to change any settings, click the Edit icon on the panel you want to edit; for example, we’ll edit the Preshared Key setting:
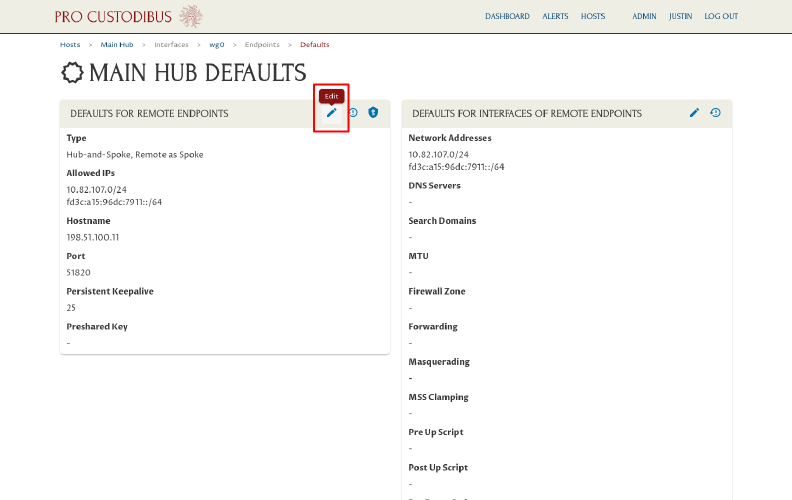
We’ll change the Preshared Key setting to Generate (to automatically generate a unique preshared key for each new endpoint), and then click the Update button to save the change:
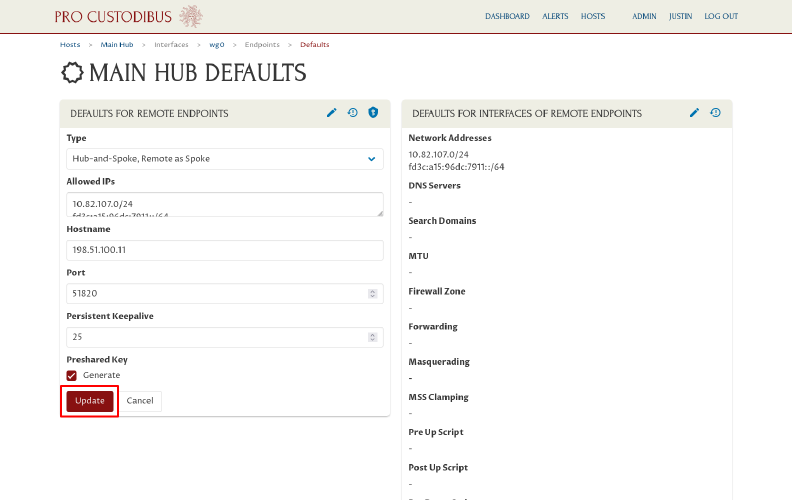
These settings will be used for the new hosts we create in the next section (Upload a List of Hosts). See the Defaults for Remote Endpoints documentation for more details about these settings.
Upload a List of Hosts
Now we’re ready to enroll a bunch of hosts into our WireGuard network.
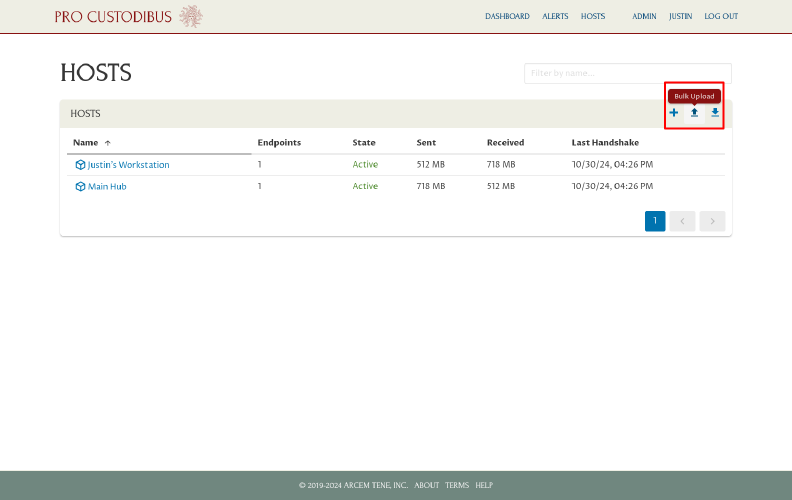
Navigate back to the Hosts page, and click the Bulk Upload icon:
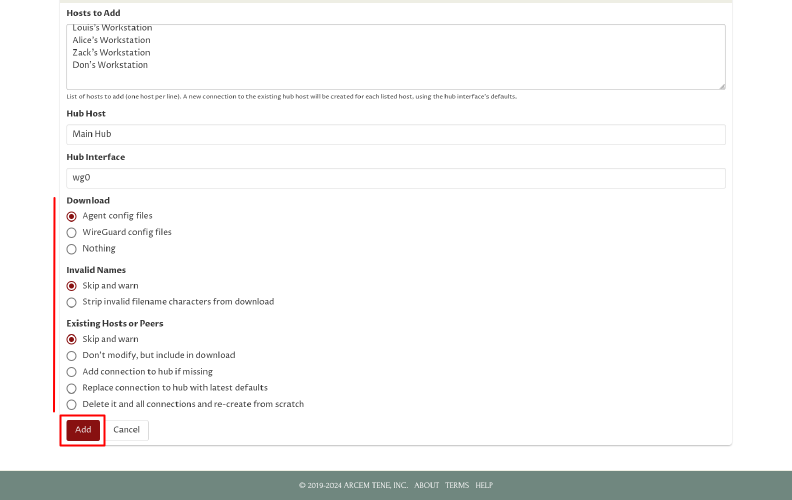
On the Add Hosts by Bulk page, fill in the Hosts to Add field with a list of hosts that to enroll:
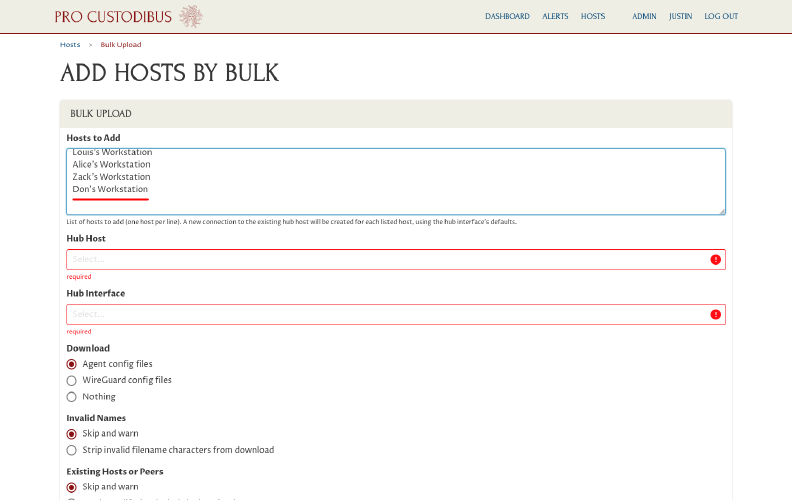
Add as many hosts as you like, one host name per line (where each host name is a display name like “Alice’s Laptop”).
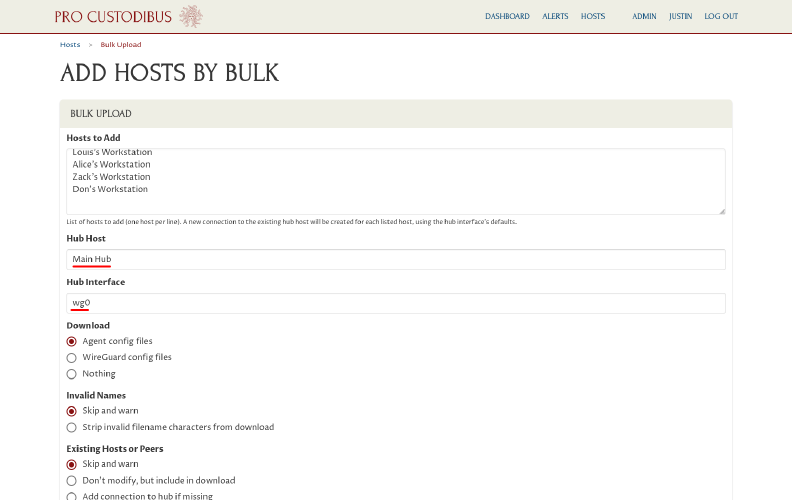
Then, for the Hub Host and Hub Interface fields, select the hub host and interface we created previously in the Set Up the Hub Host section:
|
Tip
|
Type a word or a few letters into the Hub Host field to filter the dropdown list by name (for example, type “hub” to match hosts with the word “hub” in their name). |
Next, select the appropriate options for the Download, Invalid Names, and Existing Hosts and Peers fields.
In our case, we want to download Pro Custodibus agent config files for the hosts we create, so we’ll select the Agent config files option. For the other radio-button groups, Skip and warn is always a safe option, so we’ll use it.
Click the Add button to begin the host-enrollment process:
|
Note
|
If you expect some of the hosts in your Hosts to Add list to already exist, you may want to choose another option for the Existing Hosts or Peers radio-button group.
|
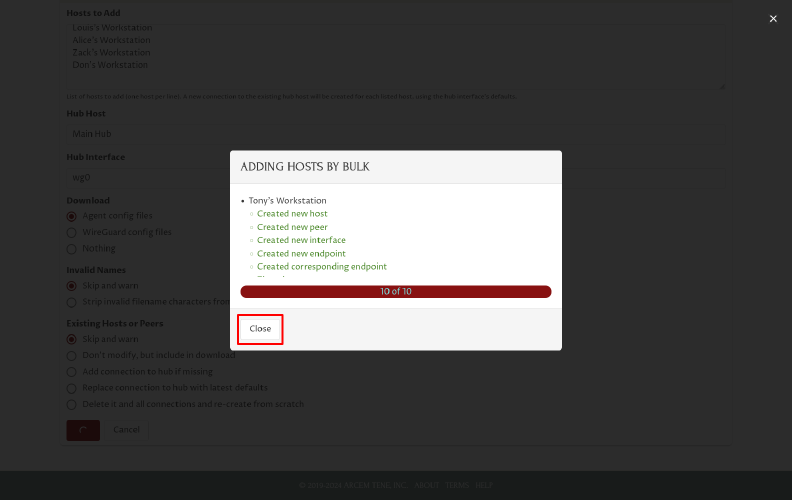
This will open an Adding Hosts by Bulk dialog box, which shows the progress of the process. Warnings and other log messages will be shown in a scrollable list above the progress bar. Scroll the list to check for any issues.
Once the process completes, the agent config files will be downloaded by your browser as a file named procustodibus-hosts.zip. Click the Close button on the dialog box to close it:
Download a Zip of Config Files
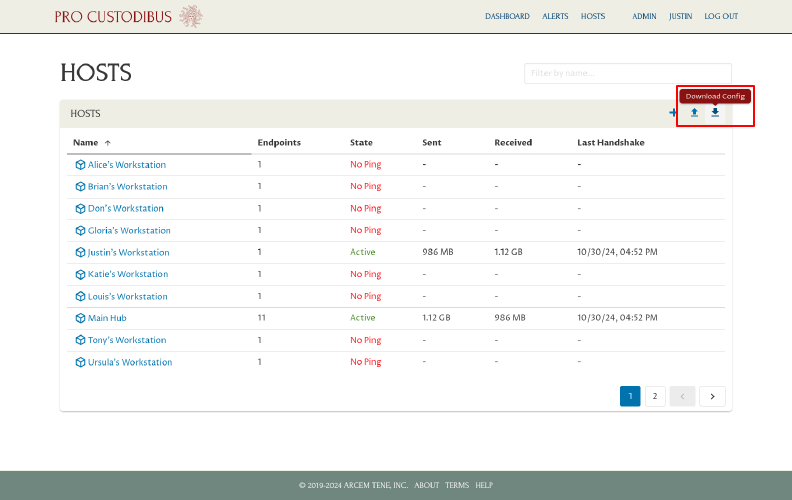
If you selected Nothing as the Download option above, or if you just want to download a complete set of agent (or WireGuard) configuration files at a later time, you can download them in a new zip file.
Navigate back to the Hosts page, and click the Download Config icon:
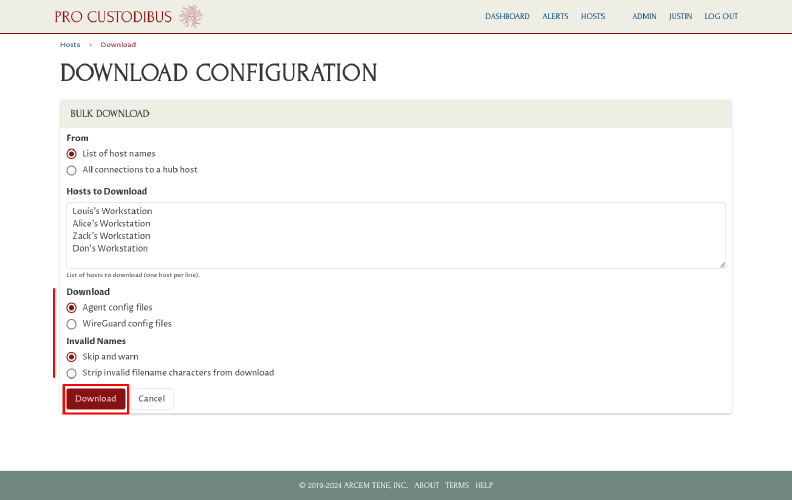
On the Download Configuration page, fill in the Hosts to Download field with a list of hosts for which you want to download config files:
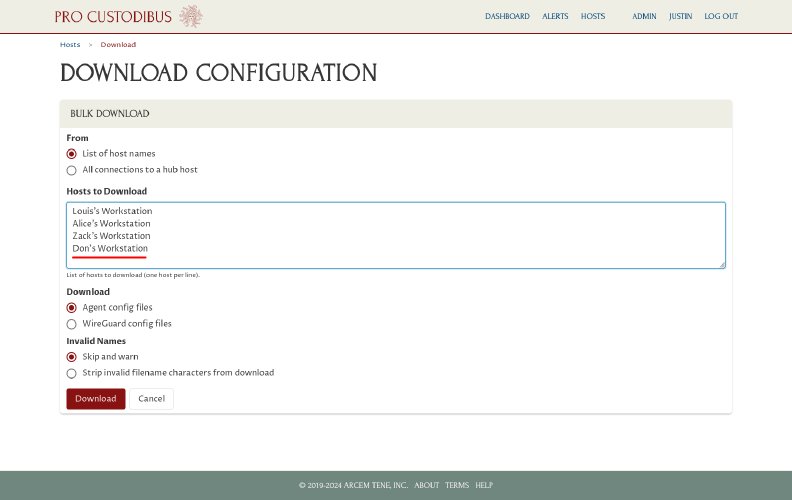
This can be the same list you used for the Upload a List of Hosts section above, or a sub-list (or super-list) of those hosts.
Next, select the appropriate options for the Download and Invalid Names fields.
In our case, we want to download Pro Custodibus agent config files, so we’ll select the Agent config files option; and for the other radio-button group, Skip and warn is always a safe option, so we’ll use it.
Click the Download button to begin the download process:
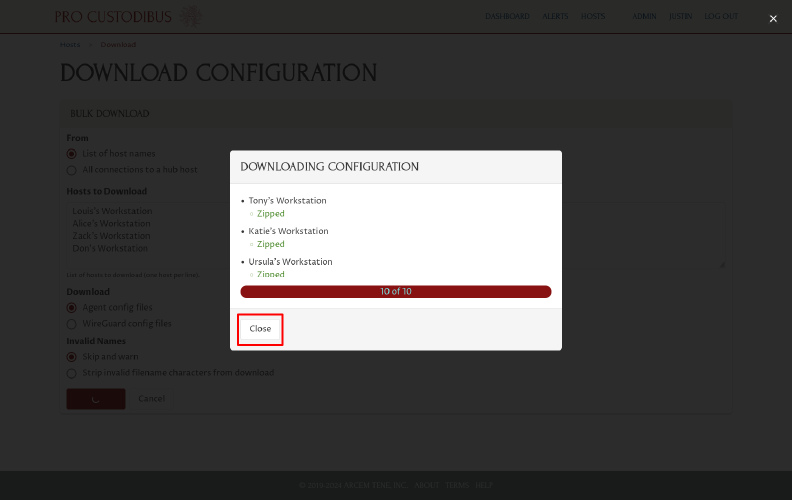
This will open a Downloading Configuration dialog box, which shows the progress of process. Warnings and other log messages will be shown in a scrollable list above the progress bar. Scroll the list to check for any issues.
Once the process completes, the agent config files will be downloaded by your browser as a file named procustodibus-hosts.zip. Click the Close button on the dialog box to close it:
If you examine the downloaded procustodibus-hosts.zip file (from this section, or from the Upload a List of Hosts section above), you’ll see it contains a separate directory for each host, all under a top-level hosts directory:
$ unzip -l procustodibus-hosts.zip
Archive:  procustodibus-hosts.zip
  Length      Date    Time    Name
---------  ---------- -----   ----
      233  2024-10-30 16:41   hosts/Tony's Workstation/procustodibus.conf
      183  2024-10-30 16:41   hosts/Tony's Workstation/procustodibus-setup.conf
      234  2024-10-30 16:41   hosts/Katie's Workstation/procustodibus.conf
      183  2024-10-30 16:41   hosts/Katie's Workstation/procustodibus-setup.conf
      237  2024-10-30 16:41   hosts/Ursula's Workstation/procustodibus.conf
      185  2024-10-30 16:41   hosts/Ursula's Workstation/procustodibus-setup.conf
      235  2024-10-30 16:41   hosts/Wendy's Workstation/procustodibus.conf
      184  2024-10-30 16:41   hosts/Wendy's Workstation/procustodibus-setup.conf
      235  2024-10-30 16:41   hosts/Brian's Workstation/procustodibus.conf
      184  2024-10-30 16:41   hosts/Brian's Workstation/procustodibus-setup.conf
      237  2024-10-30 16:41   hosts/Gloria's Workstation/procustodibus.conf
      185  2024-10-30 16:41   hosts/Gloria's Workstation/procustodibus-setup.conf
      235  2024-10-30 16:41   hosts/Louis's Workstation/procustodibus.conf
      184  2024-10-30 16:41   hosts/Louis's Workstation/procustodibus-setup.conf
      235  2024-10-30 16:41   hosts/Alice's Workstation/procustodibus.conf
      184  2024-10-30 16:41   hosts/Alice's Workstation/procustodibus-setup.conf
      233  2024-10-30 16:41   hosts/Zack's Workstation/procustodibus.conf
      183  2024-10-30 16:41   hosts/Zack's Workstation/procustodibus-setup.conf
      231  2024-10-30 16:41   hosts/Don's Workstation/procustodibus.conf
      182  2024-10-30 16:41   hosts/Don's Workstation/procustodibus-setup.conf
---------                     -------
     4182                     20 files
The directory for each host in the zip will contain two files: procustodibus.conf and procustodibus-setup.conf.
The procustodibus.conf files will look like this:
$ unzip -p procustodibus-hosts.zip "hosts/Tony's Workstation/procustodibus.conf"
# procustodibus.conf generated 10/30/2024, 4:41:33 PM PDT
[Procustodibus]
# Tony's Workstation Agent
Agent = 4RrXnuBEqeG
# Tony's Workstation
Host = BvrBowWsM7U
And the procustodibus-setup.conf files like this:
$ unzip -p procustodibus-hosts.zip "hosts/Tony's Workstation/procustodibus-setup.conf"
# procustodibus-setup.conf generated 10/30/2024, 4:41:34 PM PDT
[Procustodibus.Setup]
# Tony's Workstation Agent
Agent = 4RrXnuBEqeG
Code = TY7pzPjcBvC
Expires = 2024-11-02T23:41:34Z
|
Tip
|
The setup files will expire in 3 days, if not used by an agent. To convert a temporary setup file to a permanent credentials file that does not expire, run the The |
Deploy these two files for each host in the following OS-specific directories on the host, using your preferred configuration-management tool (such as Ansible):
-
Windows:
C:\Program Files\Pro Custodibus Agent\cnf\ -
macOS:
/opt/homebrew/etc/wireguard/ -
Linux:
/etc/wireguard/ -
FreeBSD:
/usr/local/etc/wireguard/
Then deploy the Pro Custodibus agent installer on each host, and run it.
This will start the Pro Custodibus agent running on each host. Each agent will download the queued changes for the host from the Pro Custodibus server, and apply them. When this happens, the host will be connected to the WireGuard network, and should be able to access all the other hosts in the network through the hub.
In our example network, from Tony’s Workstation, he should be able to ping our test workstation with the following command:
$ ping -nc1 10.82.107.2
PING 10.82.107.2 (10.82.107.2): 56 data bytes
64 bytes from 10.82.107.2: seq=0 ttl=63 time=27.8 ms

--- 10.82.107.2 ping statistics ---
1 packets transmitted, 1 packets received, 0% packet loss
rtt min/avg/max/mdev = 27.761/27.761/27.761/0.000 ms